After many years hiatus, I'm trying to do a little tapestry weaving again. I upgraded my regular 'frame' to have pegged screws, to keep the tension even. I used a drill press (not shown) after first marking out regular pinpoints in pencil on the backside of a picture frame. I actually used lined wide rule notebook paper to get my spacing.

It took a long time to warp the string, and I tied it at the edges with a good amount wrapped around the frame for extra on each end.

Tapestry is a technique where you will have to go back later and clean up all the threads - leave them there and don't tie them all tight yet - the tension of the whole piece may shift a little as you go.. so you want room for that. Leave a tail of at least three to five inches sticking out after finishing any color - tuck it behind while you work if it is getting in the way.. but we'll clean them up with a big yarn needle (tapestry needle) at the end.

This is how the tapestry is coming along... still a bit of a ways to go but I am about three quarters there. One thing about tapestry -when you draw the picture out, the results will be 'squished' vertically.. so plan wide if you want tall...
About making the loom...
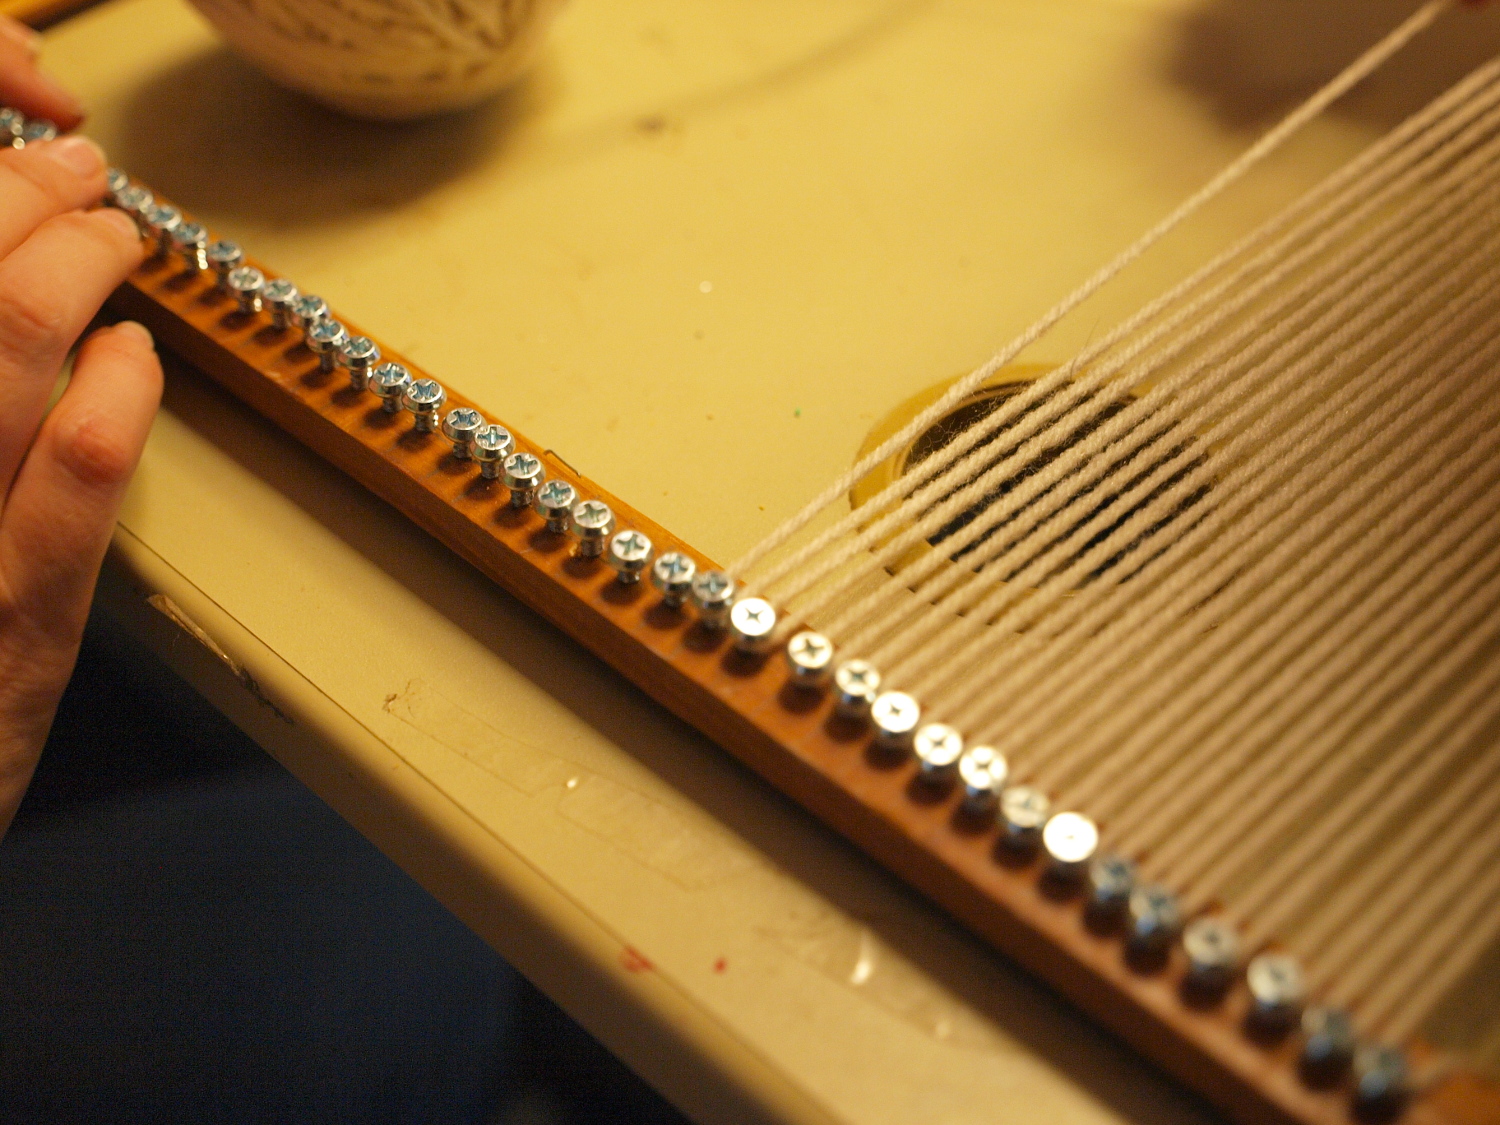
After the screws were all in, we began to warp the loom by running the ball of yarn back and forth and catching it on the pegs like this. At times, we had to stop and take the screwdriver to a screw and adjust it a tiny bit to get the yarn between them.

Adjust the screws with the screwdriver.

Running the yarn back and forth

Planning shapes and building up bit by bit.. if there is too big of jump between areas of colors, best to make a new tassel of yarn and start that as its own section. The bottom of this weaving has two levels of 'rya knot' fringe.. which I was practicing with.

No comments:
Post a Comment